Hey everyone,
Installed the catless downpipe yesterday and wanted to provide a walk through for anyone else looking to do this mod themselves. The entire thing was performed in my driveway on some ramps (back wheels) and a floor jack (so I could get under the car a little more). The install would be much easier if you have access to a lift, but I wanted to do it the hard way since most don't have access to a lift. THE EXHAUST DOES NOT NEED TO BE DROPPED, but it would make things much easier. Either way though, you will need a second set of hands to help from above/below.
Tools Needed:
2 x Car Ramps
1 x Floor Jack (optional)
E14 Torx Socket
7/16th Open End Wrench
13mm Socket
Back onto the ramps so the back of the car is raised to slide out the downpipe. If you put the front of the car on the ramps, the downpipe may contact the ground and won't be able to slide out (depending on the height of your ramps).
1) First step is to disconnect the battery in the trunk. 10mm socket is all you need. You can tuck the disconnected cable to the side of the battery so it doesn't make contact. **DO NOT CLOSE THE TRUNK AFTER THE BATTERY IS DISCONNECTED** otherwise you will have to jump the car to pop the trunk.
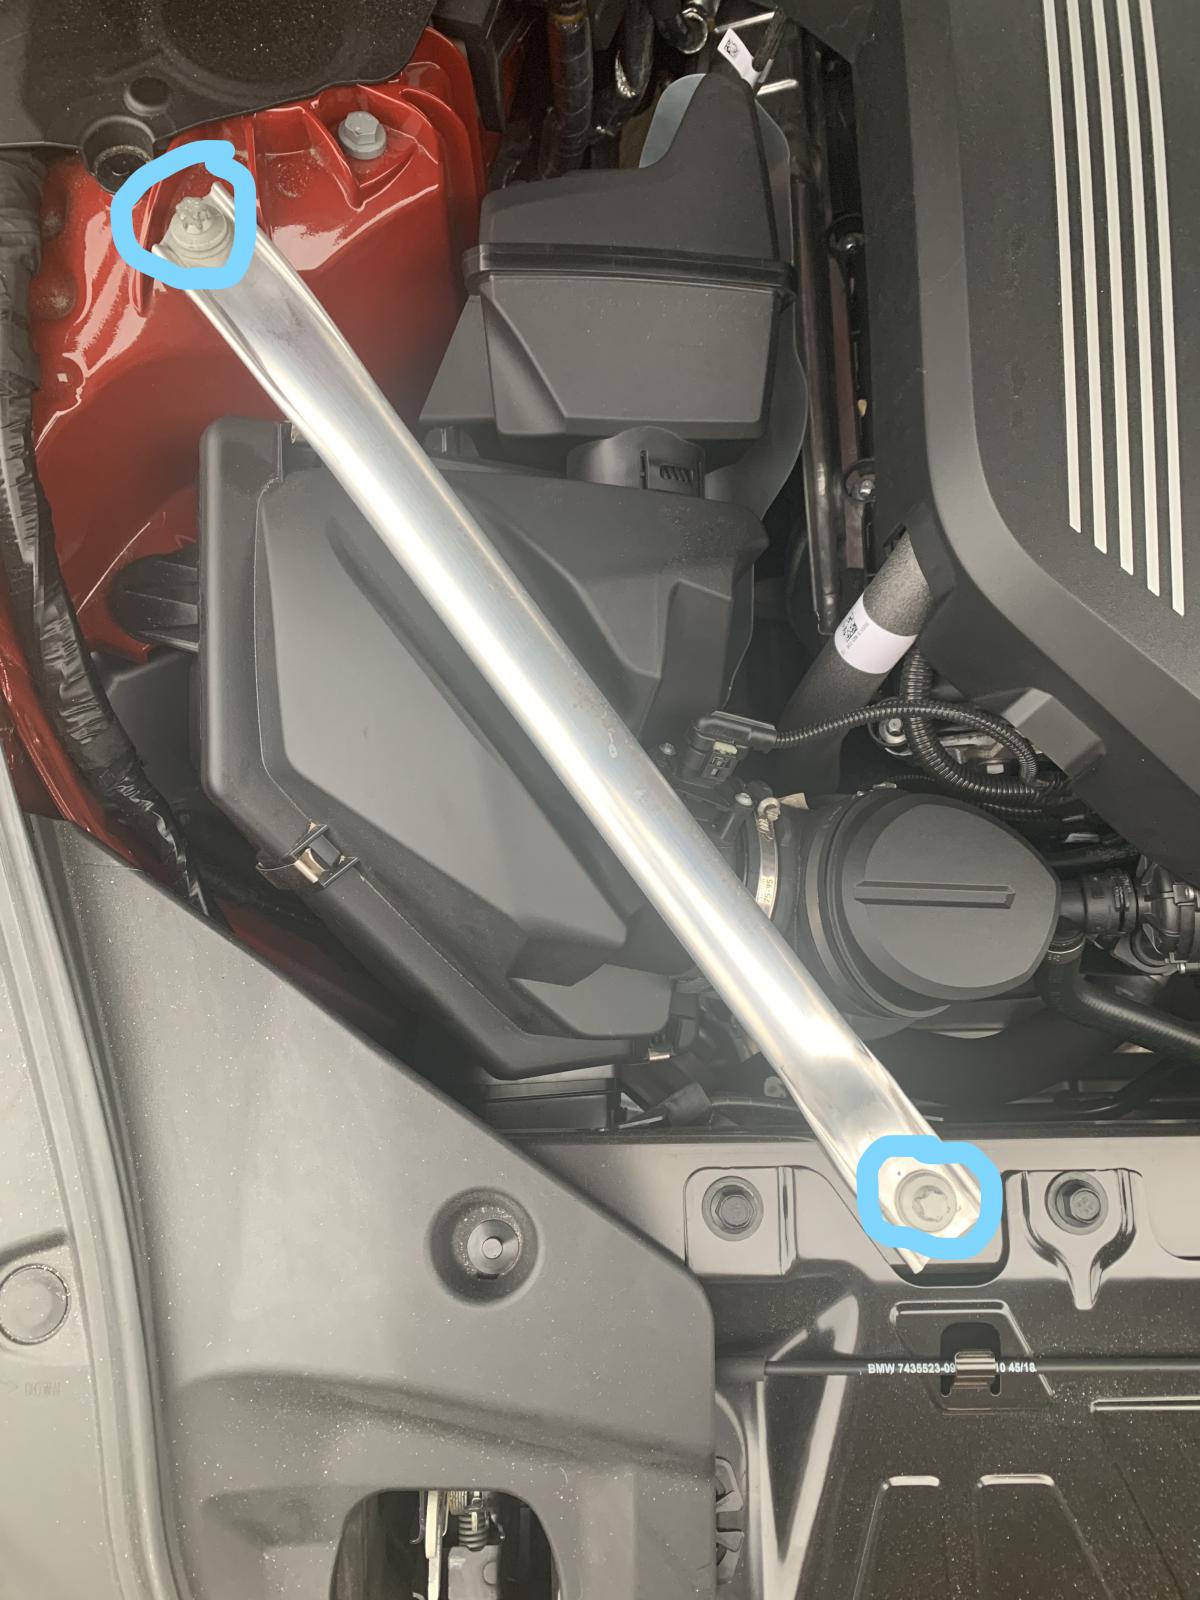
2) Under the hood, you need to start by removing the chassis brace that goes over the intake box. This is held in with 2 - E14 torx bolts.
3) Unclip the upper part of the air box. It's held in by 4 clips (locations shown below) and a hose clamp to the upper intake tube. Also disconnect the MAF sensor. The white part of the clip pulls out slightly before you can press it down to release the clip.

4) Grab the lower section of the airbox and pull straight up. It's held in by 4 rubber grommets to the chassis, no bolts or screws.

5) Remove the engine cover and locate the O2 sensor clips on the back left of the motor.

6) To safely remove these clips, you have to use a flathead screw driver to push the clip to the side. Reference the 2 pictures below.
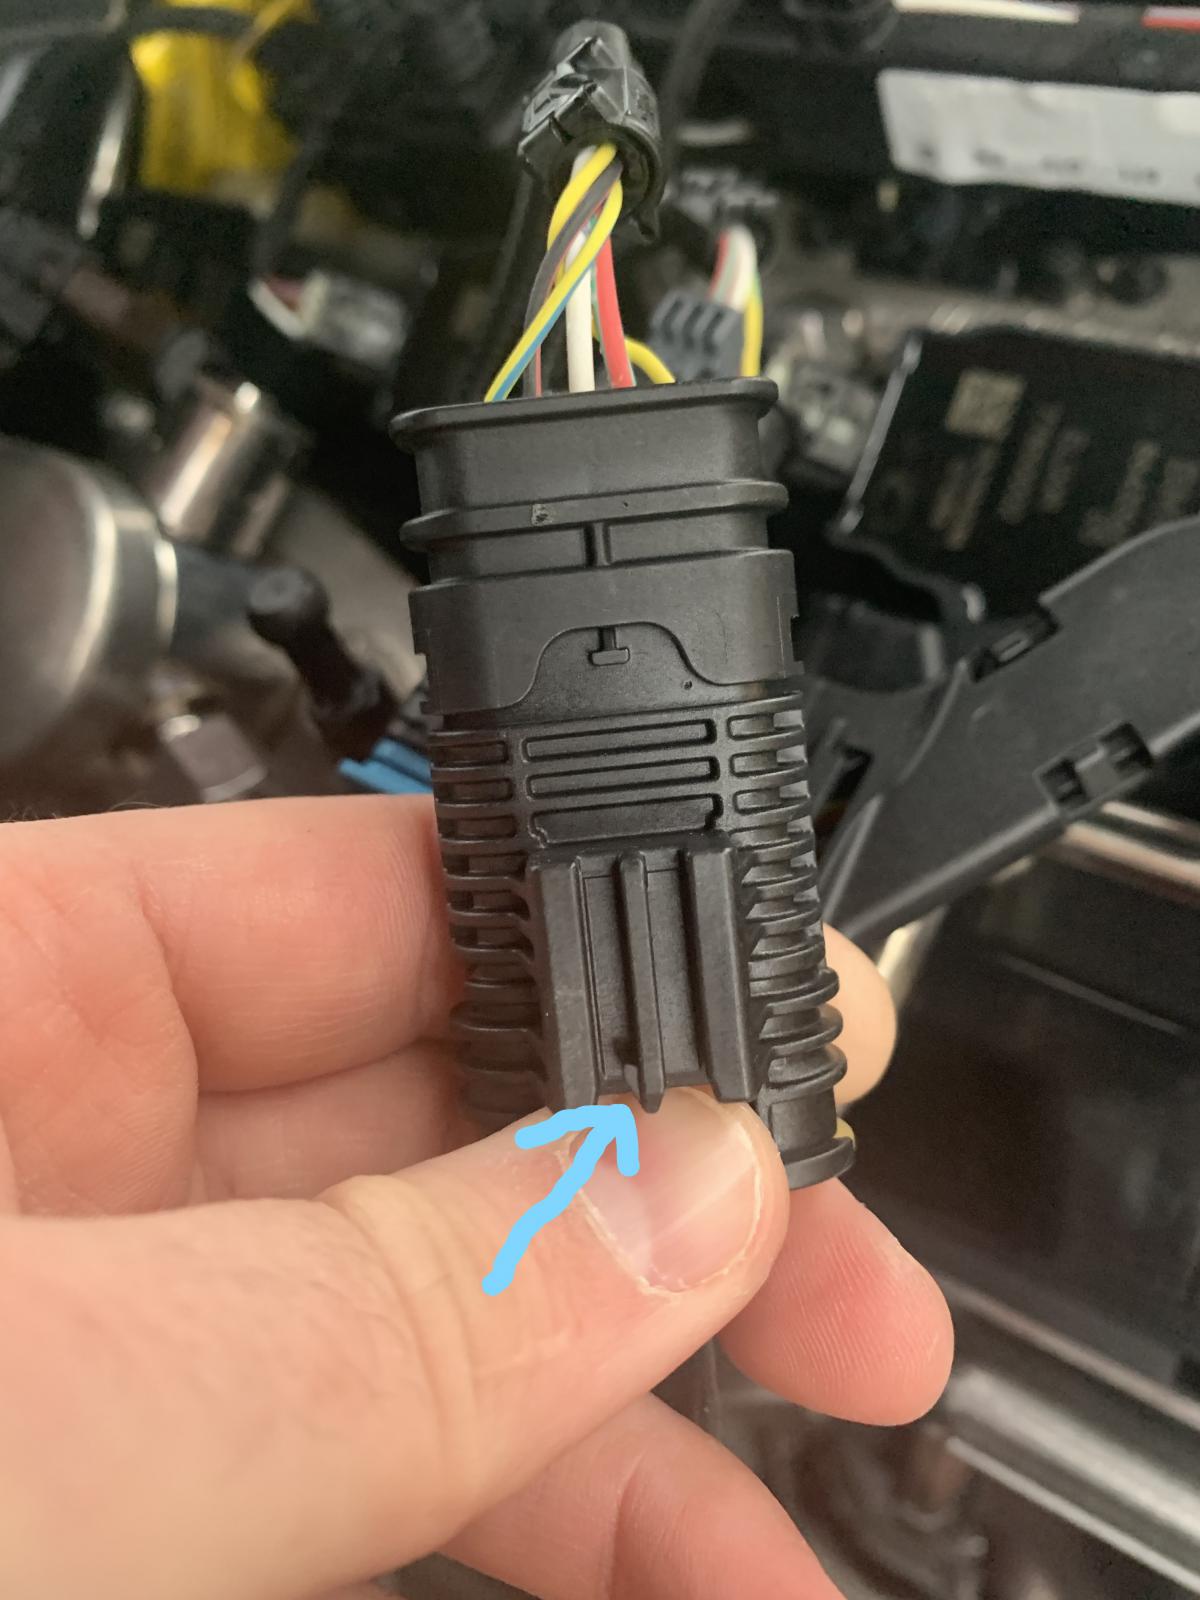

7) Disconnect the O2 sensors. Like the MAF sensor, the litter clip slides out slightly and then you can push it down and disconnect the sensor.

8) Remove the O2 wires from their clips so you can twist the wire as you unscrew the O2 sensors.
9) Next we need a 7/16 wrench to loosen the O2 sensors. Once they are loose, you can hand thread them out.

10) Just behind the back O2 sensor is a hanger for the factory downpipe. To remove the 2 bolts, you need a 13mm socket.

11) Now remove the V-band clamp from the turbo side of the downpipe. The bolt is on the bottom of the clamp out of view, but use a 13mm socket to loosen the clamp. **DO NOT FULLY REMOVE THE BOLT. THERE IS A NUT ON THE BACK SIDE THAT'S NOT CONNECTED TO THE CLAMP AND CAN FALL INTO THE ENGINE BAY** You may need to use a flat head screw driver to pry the clamp open a bit. To loosen it all the way around, try to spread the clamp and rotate it at the same time. Once it turns, you can slide it over the downpipe.

12) Under the car, we can loosen the clamp connecting the downpipe to the exhaust. Requires a 13mm socket.

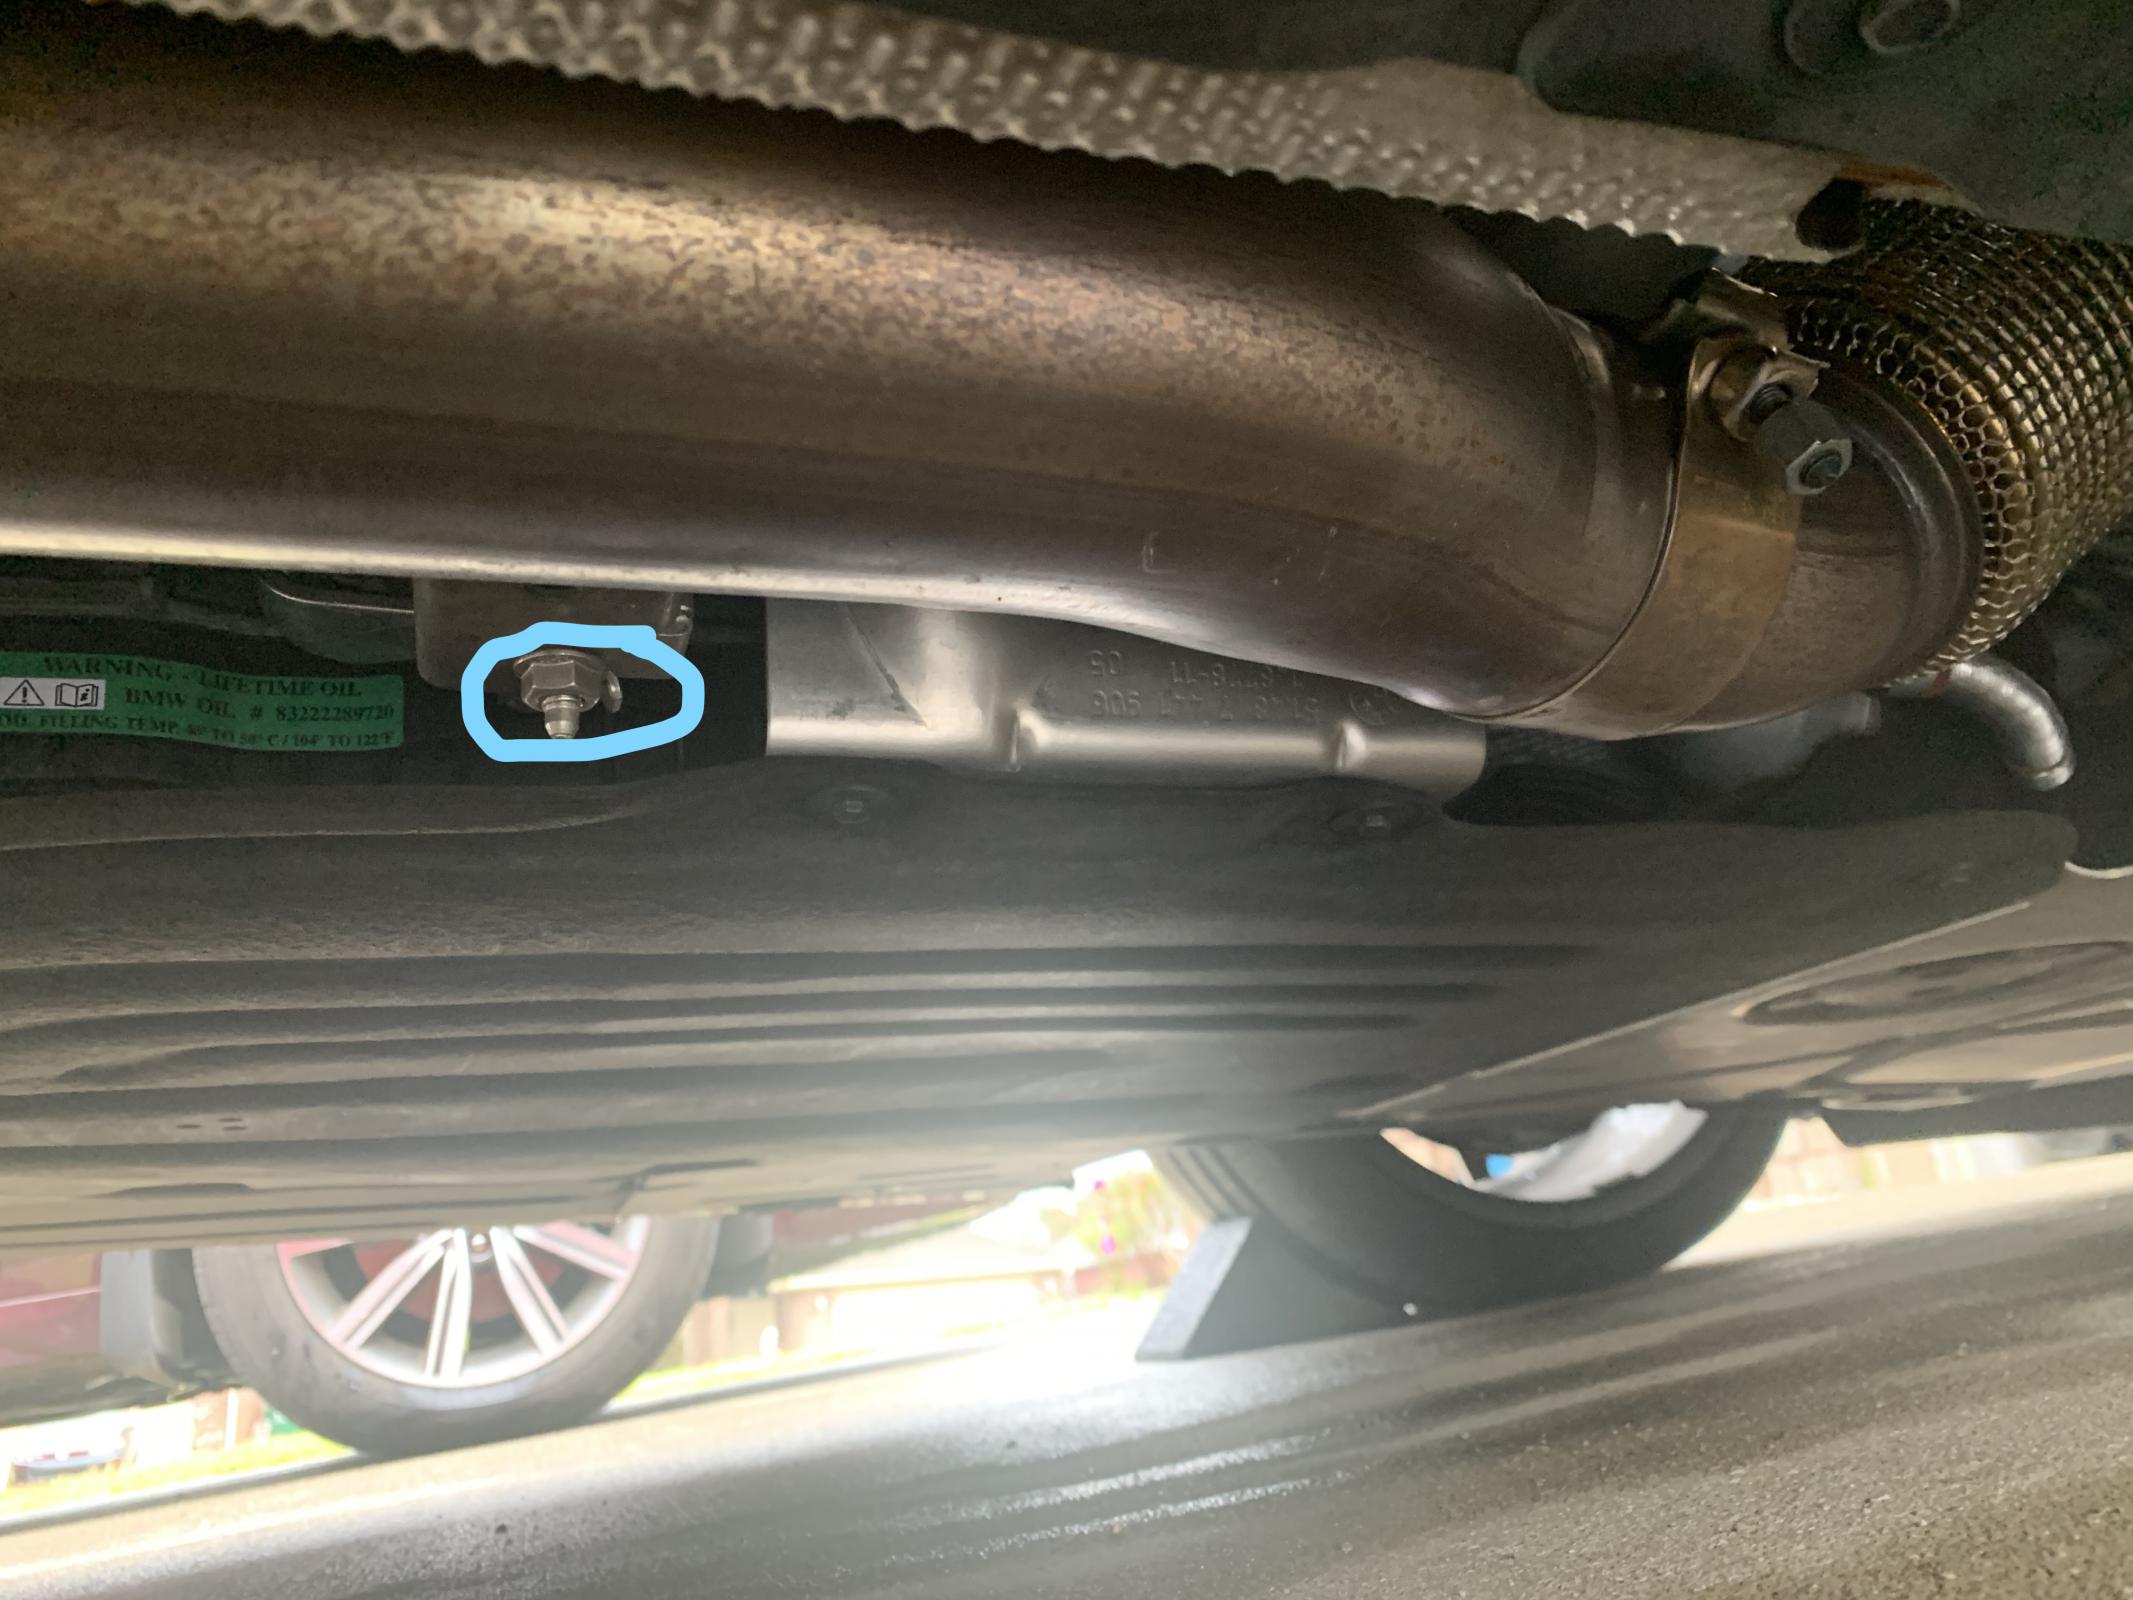
13) Remove the nut holding the exhaust up at the front section. **HOLD THE EXHAUST UP AS YOU REMOVE THE NUT SO IT DOESN'T FALL ON YOU** it drops until it rests on the chassis support a little further back, it will not fall to the ground.

14) Now you can pull the downpipe off the hanger. There's a little clip on top that you push up and slide the downpipe off.

15) The downpipe is free now. It will take a lot of wiggling up top and below to pull it out of the exhaust pipe. You will need assistance here. To get under the car enough, I used a floor jack to lift the front passenger side enough to get under.

16) Once you have the downpipe removed from the exhaust pipe, you can slide the downpipe out from under the car. I had to turn the pipe sideways (90 degrees) to get it out. If it doesn't come out turning one way, push it back up and try turning it sideways the other direction.
17) IT'S FINALLY OUT!!!

18) If you didn't buy a new gasket, you can reuse the old one. Use a small flathead screw driver to CAREFULLY pull the gasket out of the stock downpipe. Use the new downpipe as a reference of the size of the gasket if you need to.
19) Now you reverse all of your steps. Slide the new downpipe up from under the car. You need to insert the exhaust side of the downpipe into the exhaust pipe before you put the downpipe onto the factory hanger (or if your new downpipe doesn't have the hanger like my VRSF doesn't, before you connect the downpipe to the turbo). Remember to put the V-Band clamp over the downpipe before connecting it to the turbo. I reattached the clamp sideways so it's easier to access later on. **DO NOT TIGHTEN ANY CLAMPS UNTIL YOU HAVE THE EXHAUST SIDE AND V-BAND CLAMP SIDE PERFECTLY ALIGNED TO AVOID EXHAUST LEAKS** Once everything is aligned, you can tighten the bolts on both ends and add the 2 nuts for the downpipe hanger. Don't forget to reattached the exhaust pipe hanger bolt from step 13.

20) Remove the O2 bolts from the new downpipe if they're inserted.

21) Hand screw the O2 sensors back in place. The gray wire O2 goes in back, the black wire O2 goes in front (towards the turbo). Once screwed in, use the 7/16th to snug down the sensors. **DO NOT OVER TIGHTEN** they weren't overly tight to begin with. Also run the wires through the clips again so they stay out of the way. Then connect the O2 sensors again and slide them back onto the plastic rails on top of the engine.

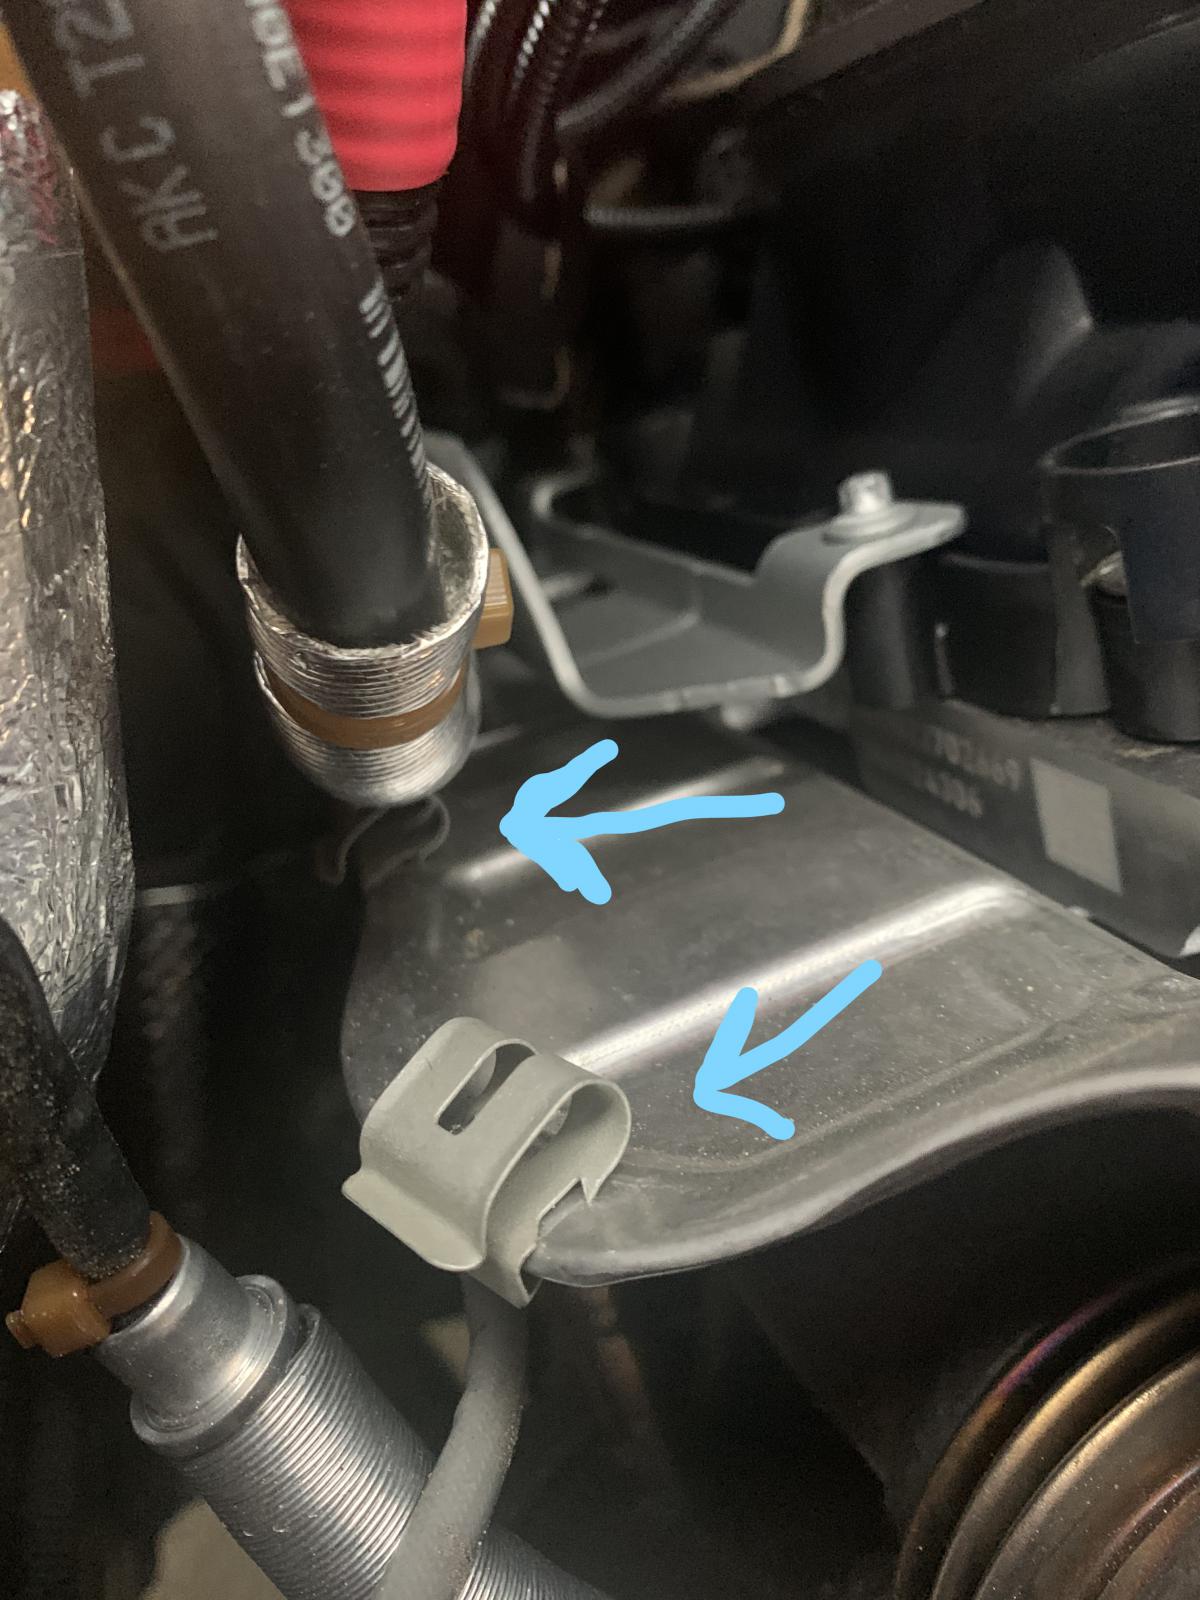
22) Grab the lower section of the air box and pull the rubber grommets off. We need to slide them back onto the holders in the engine bay. The lower one goes under the plastic snorkel and has a rubber post that pushes into the chassis. It's also grooved so that the raise part of the chassis lines up with the grommet so it only goes on one way. Look at the arrow in the picture below.

23) Push the lower section of the air box back into the grommets. It will push all the way in and be snug like before. Re-attach the upper section of the air box and secure the 4 clips and the clamp on the intake pipe and reconnect the MAF sensor.
24) Re-attach the chassis brace over the air box with the E14 torx bolts. These aren't torqued very high so tighten by hand with a 3/4" ratchet and you should be good.